


No-Bake Lotus Biscoff Cheesecake
- Siân Watt Jones

- Aug 3, 2020
- 1 min read
Updated: Apr 13, 2023
The Lotus Biscoff layer cake which I posted last week was delicious and I had a few requests for some more bakes using the Biscoff spread which I used last week so I decided to make a cheesecake. It is light and fluffy and has the perfect amount of Biscoff spread.

I also decided to make some mini cheesecakes to go in ramekins which made them a lot easier to store in the fridge and they were the perfect portion size.

No-Bake Lotus Biscoff Cheesecake
Ingredients:
Biscuit Base
· 250g Lotus Biscuits
· 60g Butter
Cheesecake Filling
· 150ml Double Cream
· 400g Full Fat Cream Cheese
· 50g Icing Sugar
· 1tsp Vanilla Extract
· 80g Biscoff Spread
Instructions:
Biscuit Base
1. Melt the butter in a pan.
2. With a food processor or by just using a rolling pin, crush the biscuits until it reaches a sandy consistency. 3. Add the biscuit crumbs to the butter and mix. Press the mixture into a 7 or 8-inch tin.

Cheesecake Filling 4. Whisk the double cream very quickly for 5 minutes with an electric whisk. 5. Add in the cream cheese, vanilla extract and icing sugar and whip for 3-5 minutes.

6. Add the spread and whisk until fully combined.
7. Fold the mixture until smooth and fluffy.
8. Spread into the tin with the biscuit base.
9. (Optional) Melt 25g of biscoff spread and drizzle on top to decorate.
10. Refrigerate for 4 hours and then enjoy.

If you want to try this using ramekins, follow the instructions the same but just use a ramekins instead of a tin.
1
Searing the Beef
Sear beef fillets on high heat for 2 minutes per side to form a golden crust. Let it cool before proceeding to keep the beef tender.
1
Searing the Beef
Sear beef fillets on high heat for 2 minutes per side to form a golden crust. Let it cool before proceeding to keep the beef tender.
1
Searing the Beef
Sear beef fillets on high heat for 2 minutes per side to form a golden crust. Let it cool before proceeding to keep the beef tender.
1
Searing the Beef
Sear beef fillets on high heat for 2 minutes per side to form a golden crust. Let it cool before proceeding to keep the beef tender.
Notes


1
Season the good fresh beef fillets with salt and black pepper. Heat olive oil in a pan over high heat and sear the fillets for 2 minutes per side until it fully browned. Remove the beef from the pan and brush with a thin layer of mustard. Let it cool.
1
Season the good fresh beef fillets with salt and black pepper. Heat olive oil in a pan over high heat and sear the fillets for 2 minutes per side until it fully browned. Remove the beef from the pan and brush with a thin layer of mustard. Let it cool.
1
Season the good fresh beef fillets with salt and black pepper. Heat olive oil in a pan over high heat and sear the fillets for 2 minutes per side until it fully browned. Remove the beef from the pan and brush with a thin layer of mustard. Let it cool.
1
Season the good fresh beef fillets with salt and black pepper. Heat olive oil in a pan over high heat and sear the fillets for 2 minutes per side until it fully browned. Remove the beef from the pan and brush with a thin layer of mustard. Let it cool.
Instructions
Quality Fresh 2 beef fillets ( approximately 14 ounces each )
Quality Fresh 2 beef fillets ( approximately 14 ounces each )
Quality Fresh 2 beef fillets ( approximately 14 ounces each )
Beef Wellington
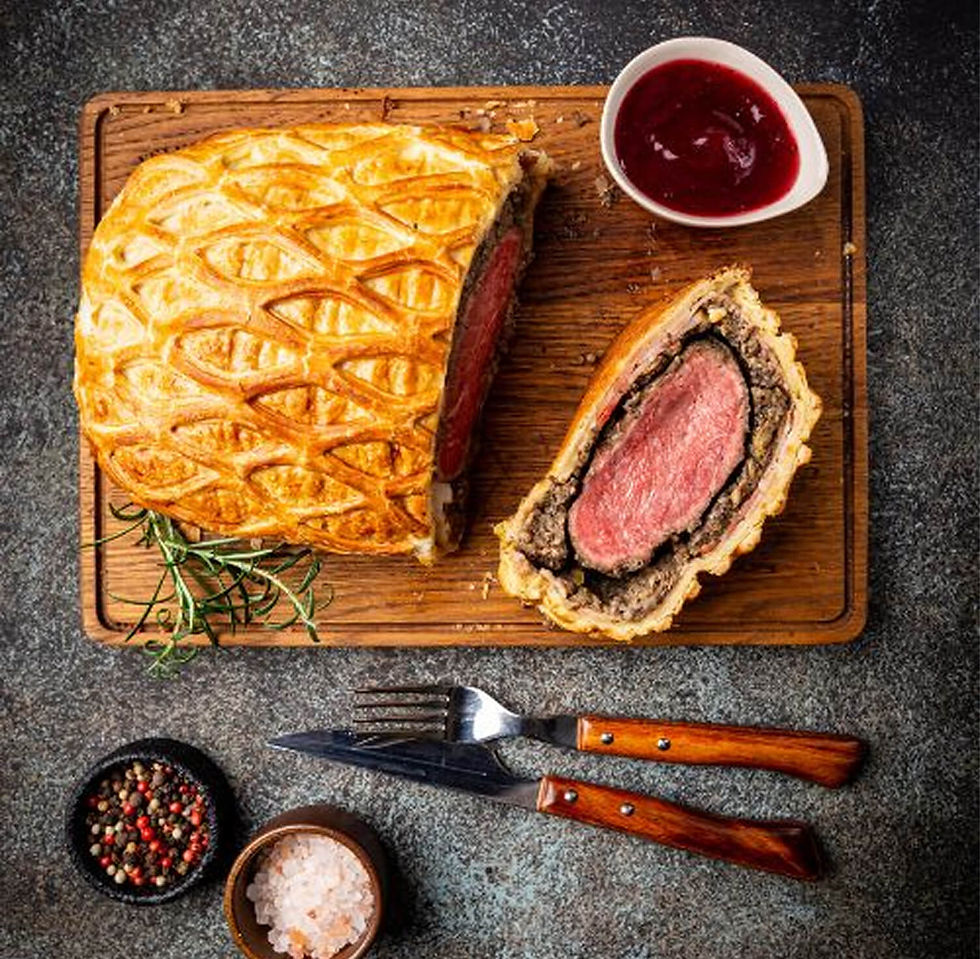
Beef Wellington
Fusion Wizard - Rooftop Eatery in Tokyo
Author Name
%20(1).jpg)
Beef Wellington is a luxurious dish featuring tender beef fillet coated with a flavorful mushroom duxelles and wrapped in a golden, flaky puff pastry. Perfect for special occasions, this recipe combines rich flavors and impressive presentation, making it the ultimate centerpiece for any celebration.
Servings :
4 Servings
Calories:
813 calories / Serve
Prep Time
30 mins
Prep Time
30 mins
Prep Time
30 mins
Prep Time
30 mins


Comments